
How to Create a GogoPogo Account – Step-by-Step Guide for New Creators
Learn how to create a GogoPogo account from scratch with this easy step-by-step guide. Follow the exact onboarding process—from clicking Get Started to accessing your dashboard—and launch your online store in minutes.
Step-by-Step Process to Set Up Your GogoPogo Account and Launch Your Online Store
If you're a creator, artist, entrepreneur, or business owner looking to launch your own merch store, GogoPogo makes the process simple and beginner-friendly.
In this detailed guide, I’ll walk you through the exact steps to create your GogoPogo account — from the login page to accessing your dashboard.
Let’s get started.
Step 1: Visit the Official Website
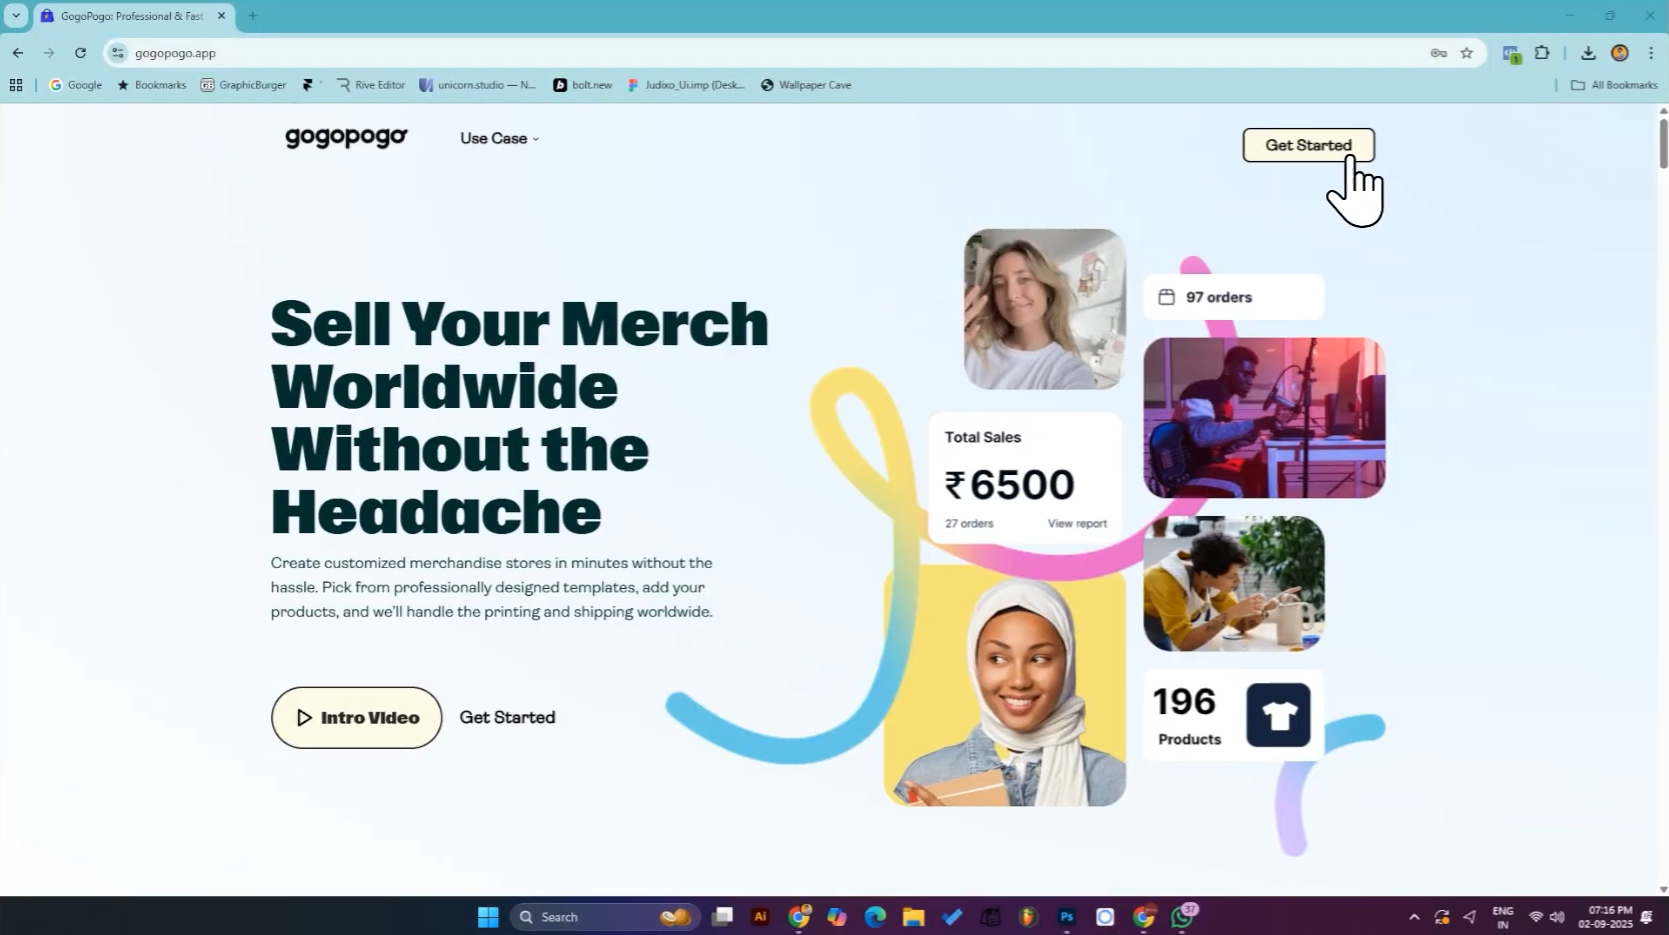
Go to: https://www.gogopogo.app
On the homepage, you will see a button labeled : Get Started
Click on Get Started.
Step 2: Sign Up Page
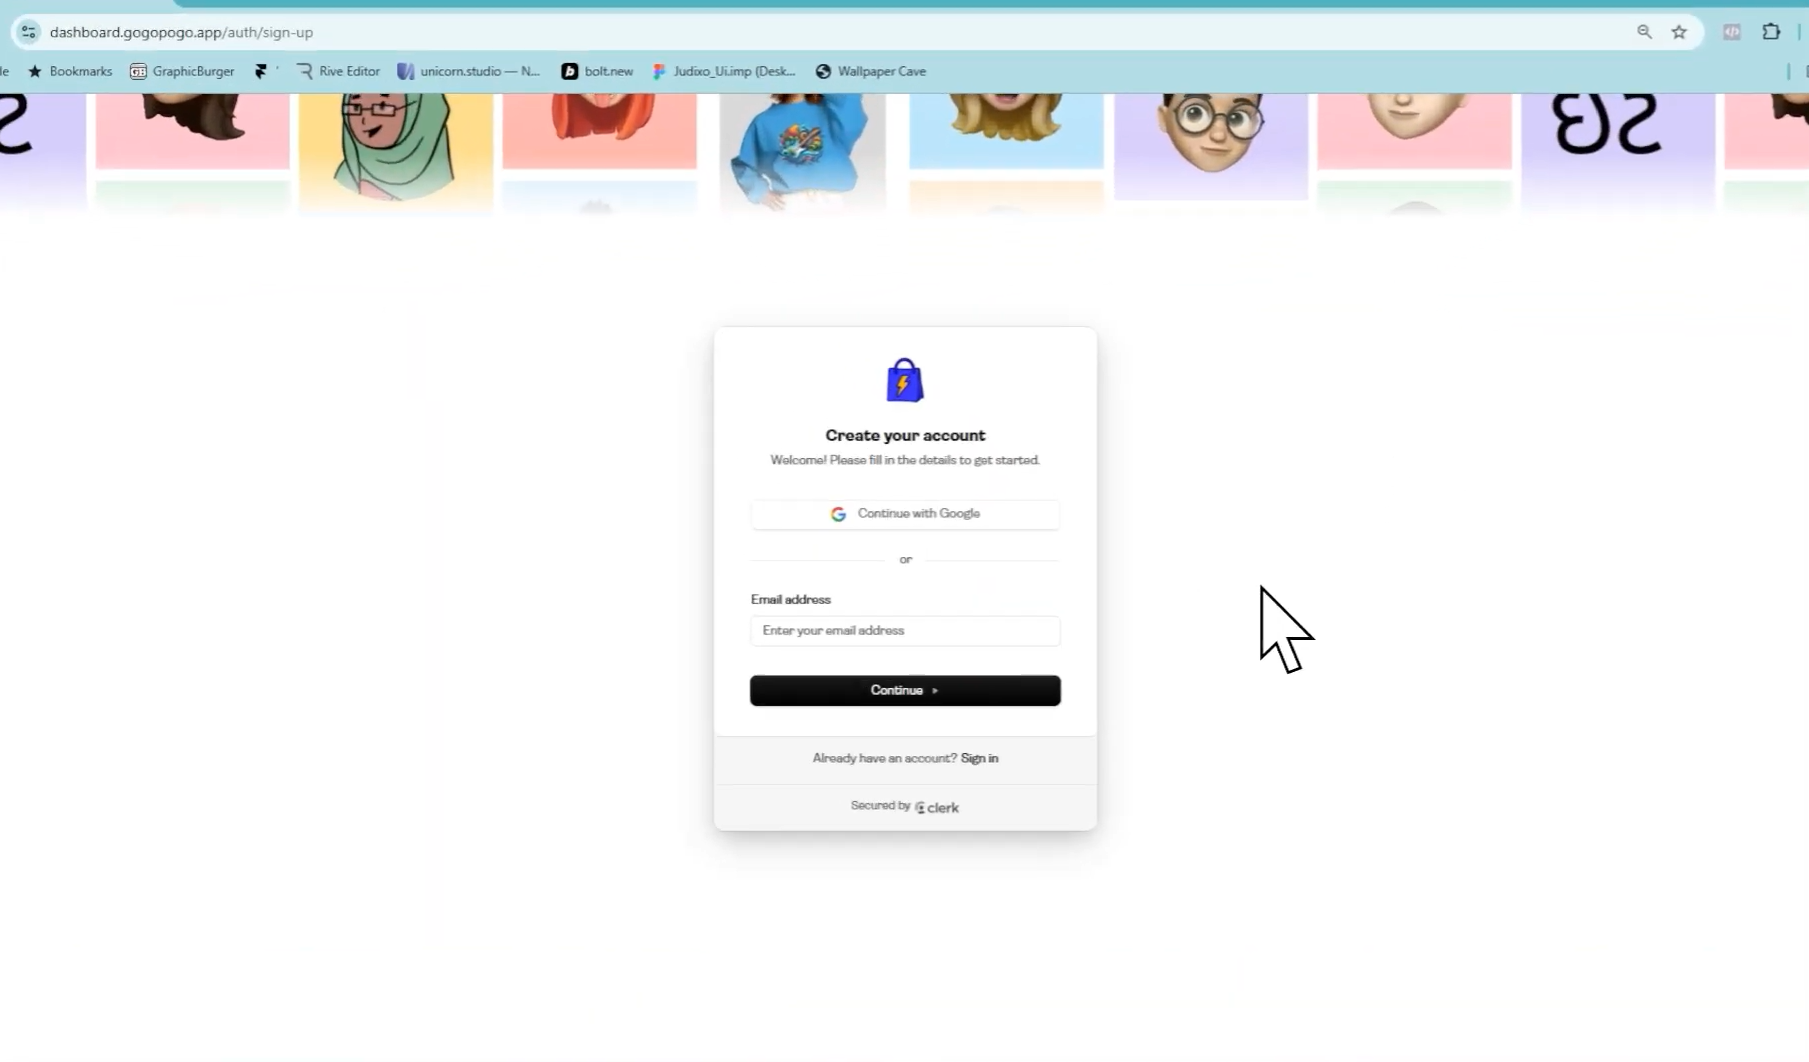
After clicking Get Started, you will be redirected to the sign-up page.
Here, you will see two options:
Continue with Google
Continue with Email Address
Choose either option to create your account.
Step 3: Welcome to GogoPogo
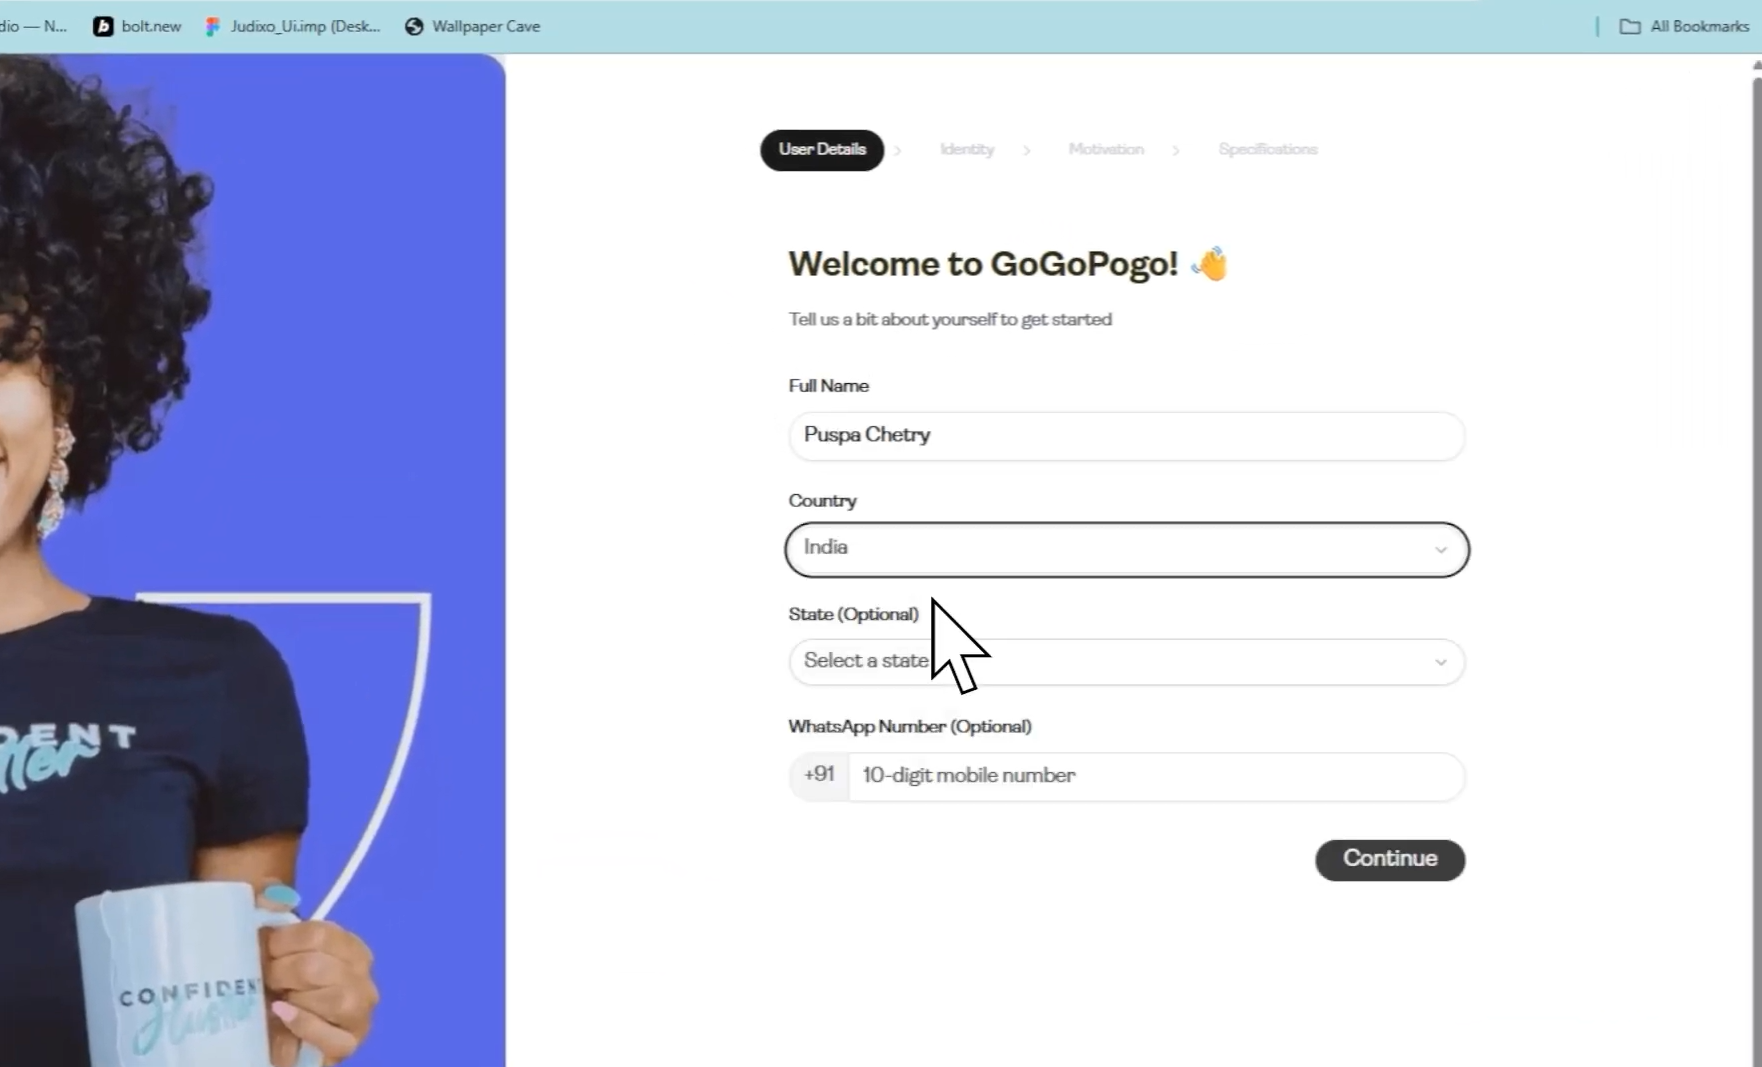
After signing up, the next screen displays : Welcome to GogoPogo
You are required to enter:
Full Name
Country
State
WhatsApp Number
Fill in the details and click continue to proceed to the next step.
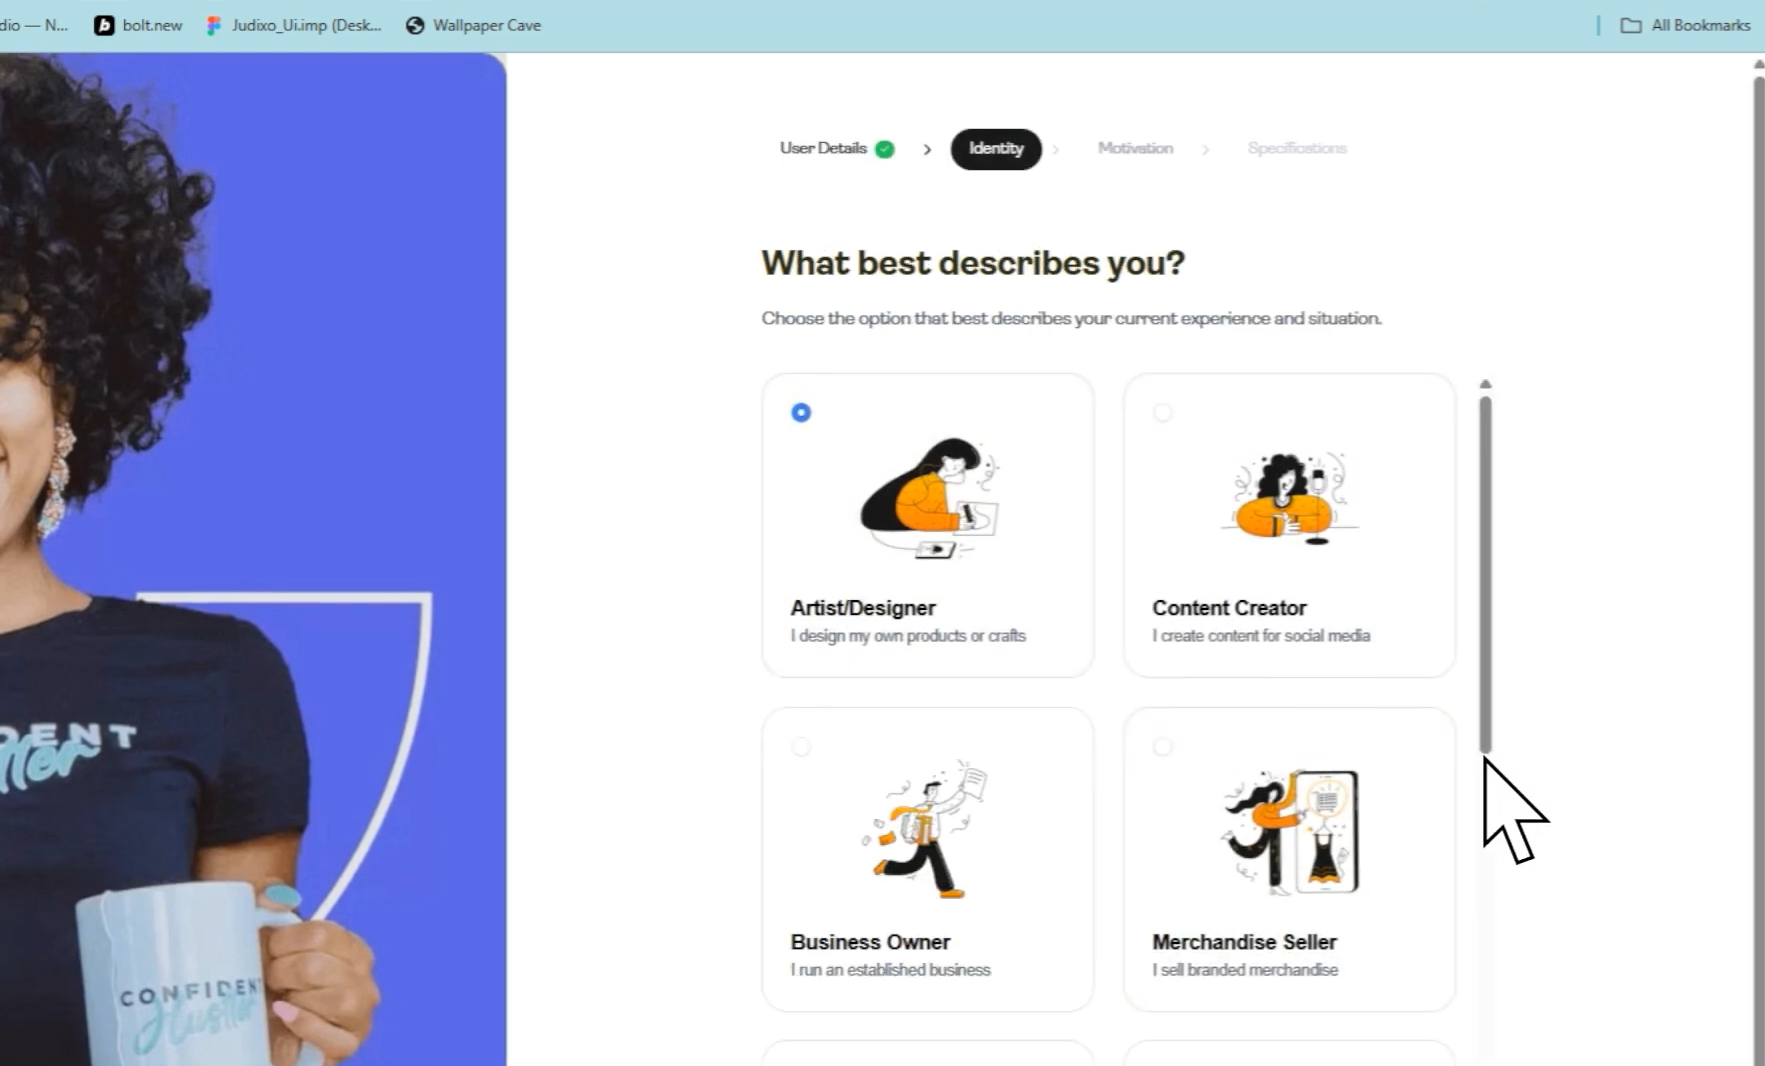
Step 4: Select Your Profile Type
The next interface asks you to describe yourself.
The options shown include:
Artist/Designer
Content Creator
Business Owner
Merchandise Seller etc.
Select the option that best describes you and proceed.
Step 5: Choose Your Selling Experience
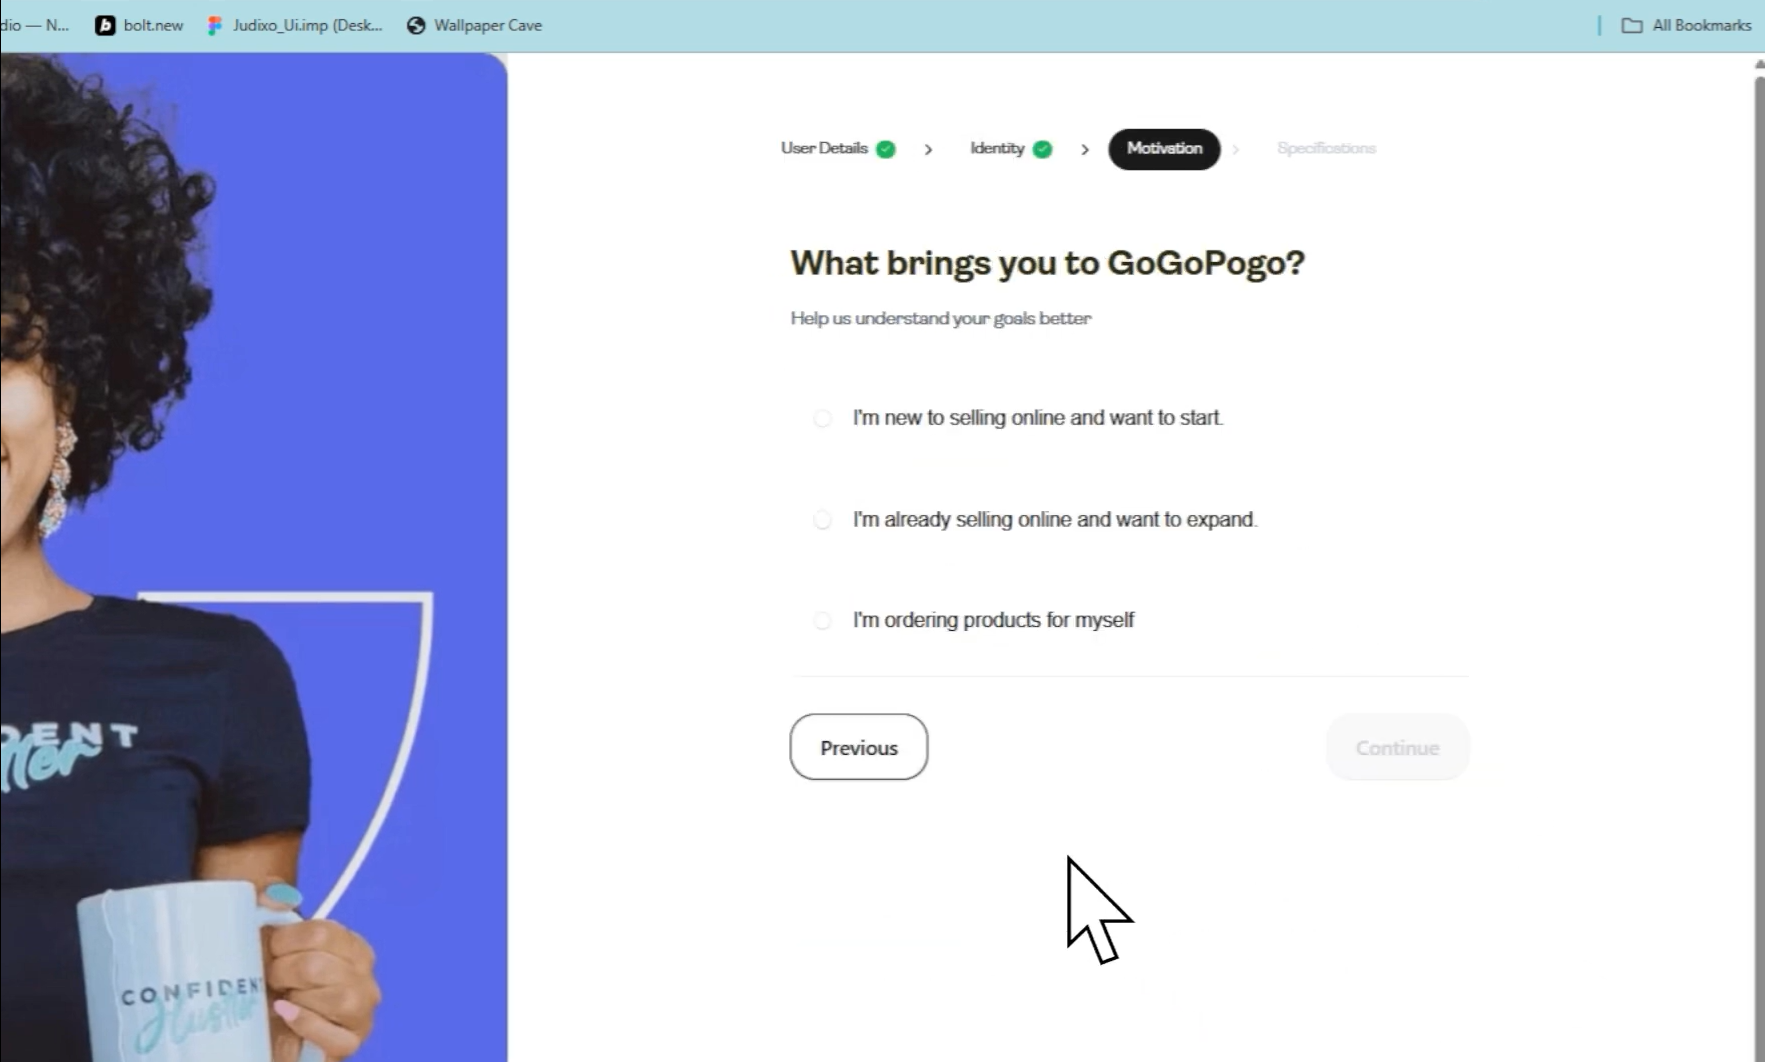
On the following screen, you will be asked about your selling experience.
The options shown include:
I’m new to selling online and want to start
I’m already selling online and want to expand
I’m ordering products for myself
Select the appropriate option and continue.
Step 6: Enter Your Store Name
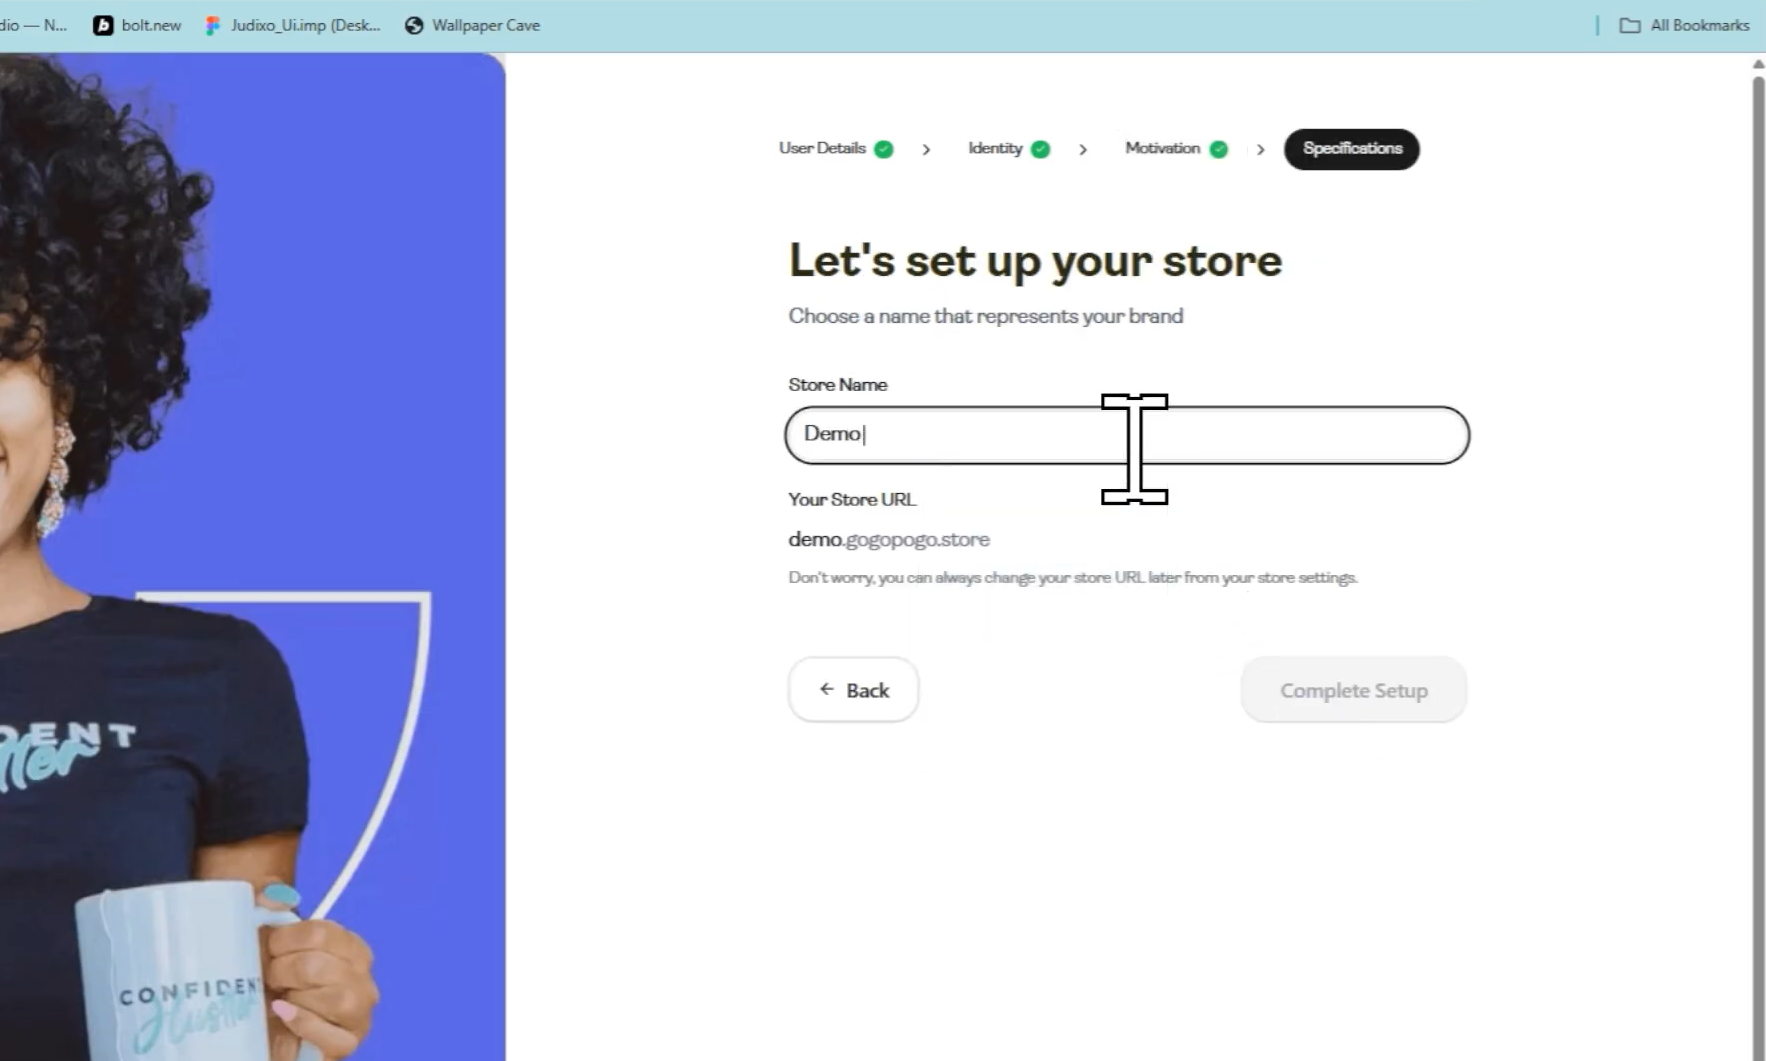
Next, you will be asked to set up your store.
You must:
Enter your Store Name
As you type your store name, the platform automatically generates your Store URL below it.
Review the URL and after confirming your store name, click on Complete Setup to complete the registration process.
Step 7: Redirect to Dashboard
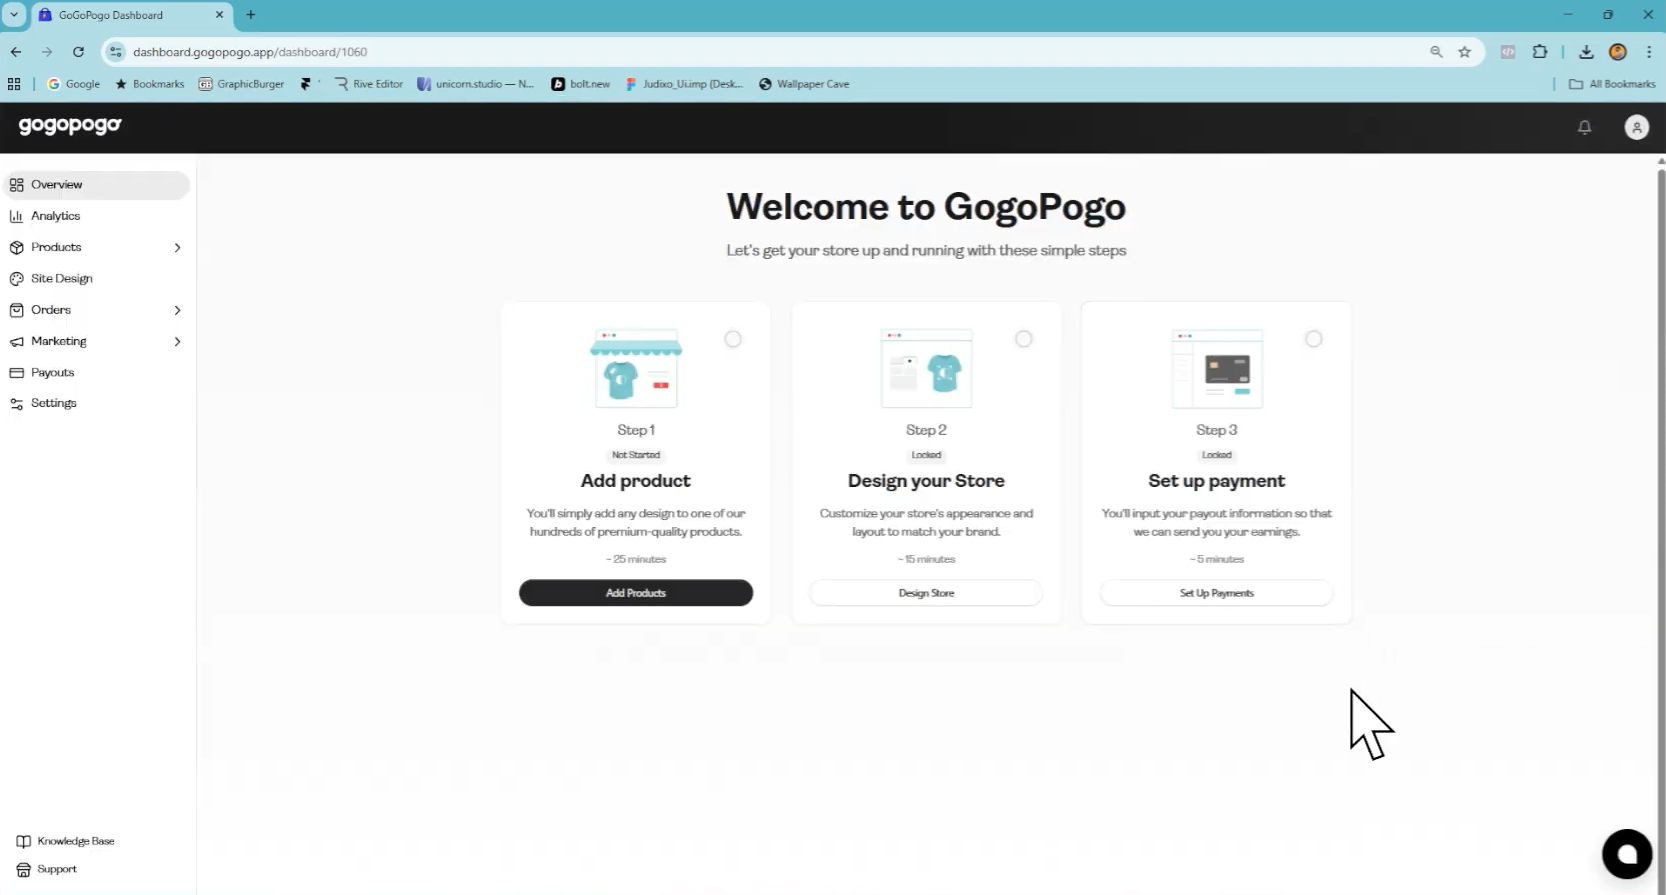
Once the setup is completed, you will be automatically redirected to the GogoPogo dashboard page.
From here, you can manage your store, add products, and customize your settings.
Creating an account on GogoPogo is a simple, guided process that takes just a few minutes to complete. Once your dashboard is ready, you can immediately start building and managing your online store.